API with Nest js and sequelize


Table of contents
We'll start from the vey basic. Install nestjs cli globally and use it to create the nest js project.
$ npmi -g @nestjs/cli
$ nest new project-name
Run the project
npm run start
Go to main.ts file to check what port the app is running
async function bootstrap() {
  const app = await NestFactory.create(AppModule);
  await app.listen(3030);
}
bootstrap();
The port is hardcoded here and running on port 3000. You can see the project live on localhost:3000
Now that the project is set up , we can move to the API creation.
Creating Api endpoint
With the nest cli, you don't need to create file manually. You can run the generate command and get it done via the cli. You don't need to remember each command, you can use help to get the list of command as:
> nest generate --help

The nest project is module based, that means the controller, model, service for one page is all inside one folder. So instead of creating a controller, service, module separately, Let's generate the whole resource with one command.
nest g resource portfolio
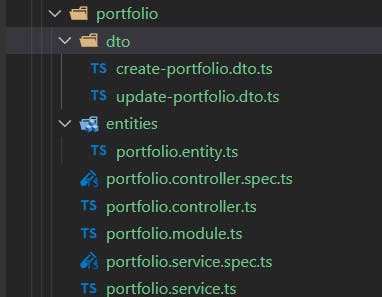
As you can see it created a portfolio folder inside the src. This folder has controller, module, service, entity folder and dto folder. The entity is the model for the portfolio, dto is also a model but is used to define the structure of object for reading data or for modification.
Let’s understand the dto in short
DTO
DTO stands for data transfer object. The main concept of dto is to specify, what the request should look like. Js is a dynamic language and you can send anything. Hence Dto is not there for validation of what is passed but to let the developer know what should be passed. If you want to validate, you can use library like class-validator and runtypes.
The dto and entity does not have to be separate, especially for small projects. But as the project grows bigger, it’s need arises.
There are two type of dto:
read DTO : used for querying and filtering
Input DTO : used for creating and updating record
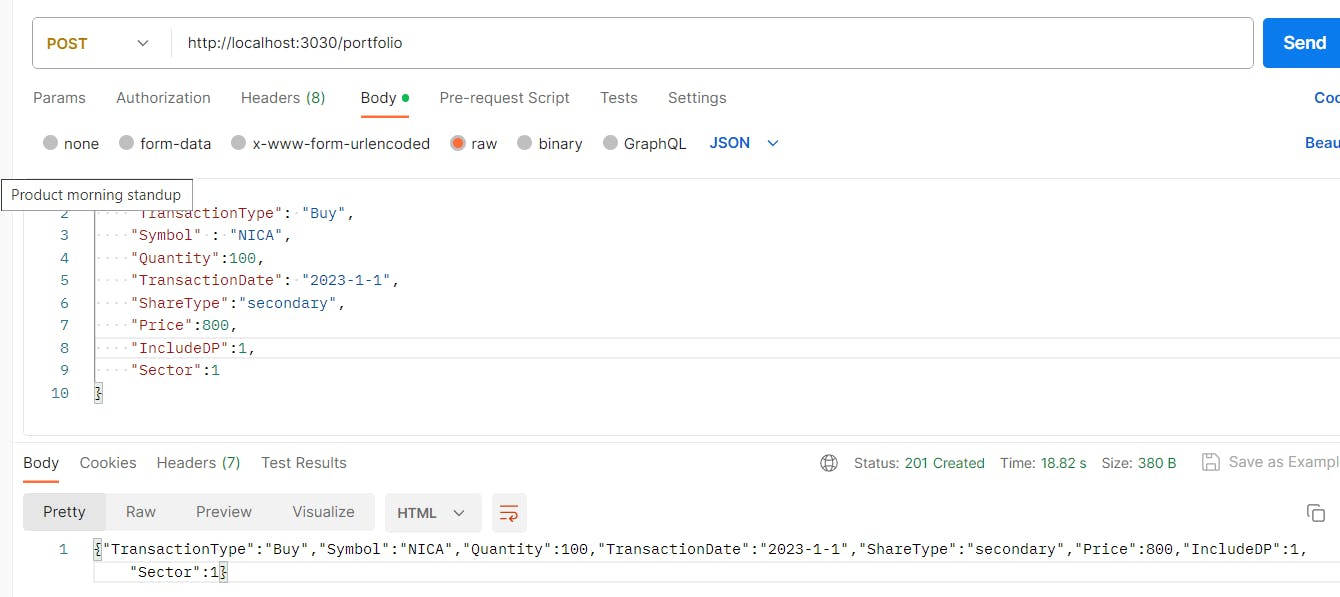
Let's quickly check our new api endpoint with minimal code change
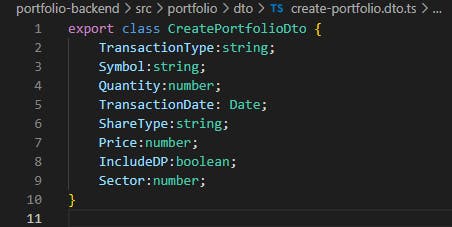
create-portfolio.dto.ts
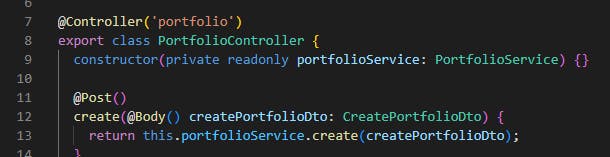
portofolio.controller.ts
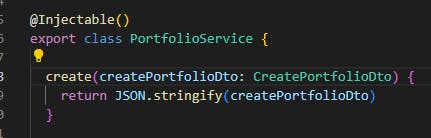
portfolio.service.ts
Quick test on postman
So far so good. Now we need the database involvement.
Database Configuration
We'll use sequelize as an ORM, postgress as database.
Env Configuration
nest js provide a @nestjs/config package to help load our .env file.
npm i --save @nestjs/config
Import the @nestjs/config into your app root module
Setting it as Global will make the .env properties available throughout the application.
Create .env.development in the root directory
APP_ENV=dev
PORT=3030
DB_USERNAME=postgres
DB_PASSWORD=#####
DB_DATABASE=####
DB_HOST=localhost
DB_DIALECT=postgres
DB_PORT=5432
We'll need to read these values from the env file in our project. For this, we'll use dotenv.
Dotenv is a lightweight npm package that automatically loads environment variables from a .env file into the process.env object.
process.env is a global variable injected by Node at the runtime for your application to use.
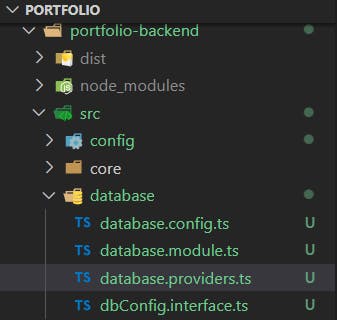
Create a database folder in the root directory
- dbconfig.interface.ts : Interface to define the structure of db config object
export interface IDatabaseConfigAttributes {
    username?: string;
    password?: string;
    database?: string;
    host?: string;
    port?: number | string;
    dialect?: string;
    urlDatabase?: string;
}
export interface IDatabaseConfig {
    development: IDatabaseConfigAttributes;
    test: IDatabaseConfigAttributes;
    production: IDatabaseConfigAttributes;
}
- database.config.ts : Here we'll read the config related to the database from the env file and use it to create a db configuration object that will be used for connecting to Postgres database using sequelize.
export const databaseConfig: IDatabaseConfig = {
    development: {
        username: process.env.DB_USERNAME,
        password: process.env.DB_PASSWORD,
        database: process.env.DB_DATABASE,
        host: process.env.DB_HOST,
        port: process.env.DB_PORT,
        dialect: process.env.DB_DIALECT,
    },
    test: {
        username: process.env.DB_USERNAME,
        password: process.env.DB_PASSWORD,
        database: process.env.DB_DATABASE,
        host: process.env.DB_HOST,
        port: process.env.DB_PORT,
        dialect: process.env.DB_DIALECT,
    },
    production: {
        username: process.env.DB_USERNAME,
        password: process.env.DB_PASSWORD,
        database: process.env.DB_DATABASE,
        host: process.env.DB_HOST,
        dialect: process.env.DB_DIALECT,
    },
};
Note here that we have used dotenv to read variable from .env file.
Also, the dotenv is configured to take the .env.{environmnet} file based on the current environment.
If the current environment is development, it will take .env.development file.
Now we have an db config object which we can use to connect to database. Let's do that.
- database.provider.ts
    import { Sequelize } from 'sequelize-typescript';
    import { databaseConfig } from './database.config';
    import { Portfolio } from 'src/portfolio/entities/portfolio.entity';
    export const databaseProviders = [{
        provide: "SEQUELIZE",
        useFactory: async () => {
            let config;
            switch (process.env.NODE_ENV) {
            case "development":
               config = databaseConfig.development;
               break;
            case "test":
               config = databaseConfig.test;
               break;
            case "production":
               config = databaseConfig.production;
               break;
            default:
               config = databaseConfig.development;
            }
            const sequelize = new Sequelize(config);
            sequelize.addModels([Portfolio]);
            await sequelize.sync();
            return sequelize;
        },
}];
To connect to a database using sequelize, all we need to do is create a new instance of Sequelize() and pass the db config object.
We add all models used in our application to sequelize as shown in code above.
Lastly, we make call to sequelize.sync() to create/update table in the database based on the Models registered to it.
We haven't yet created the Portfolio Model used here, we'll come back to it later.
Time to configure this setup in the application so that we can use the database throughout our application.
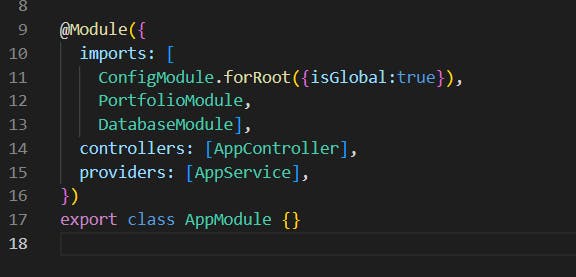
- database.modules.ts
import { Module } from '@nestjs/common';
import { AppController } from './app.controller';
import { AppService } from './app.service';
import { PortfolioModule } from './portfolio/portfolio.module';
import { DatabaseModule } from './database/database.module';
import { ConfigModule } from '@nestjs/config';

@Module({
  imports: [
    ConfigModule.forRoot({
      envFilePath:
        process.env.NODE_ENV === 'production'
          ? ['.env.production']
          : ['.env.development'],
      isGlobal: true,
    }),
    PortfolioModule,
    DatabaseModule],
  controllers: [AppController],
  providers: [AppService],
})
export class AppModule {}
Now we have almost everything we need to Create a new record in the database. Let’s create our Portfolio Model inside portfolio/entities
import { Column, DataType, Table, Model } from "sequelize-typescript";
@Table
export class Portfolio extends Model<Portfolio> {
    @Column({
        type:DataType.ENUM,
        values: ['Buy', 'Sell'],
        allowNull:false
    })
    TransactionType:string;
    @Column({
        type:DataType.STRING,
        allowNull:false
    })
    Symbol:string;
    @Column({
        type:DataType.INTEGER,
        allowNull:false
    })
    Quantity:number;
    @Column({
        type:DataType.DATEONLY,
        allowNull:false
    })
    TransactionDate:string;
    @Column({
        type:DataType.ENUM,
        values: ['IPO', 'FPO', 'Secondary', 'Bonus', 'Right', 'Auction'],
        allowNull:false
    })
    ShareType:string;
    @Column({
        type:DataType.FLOAT,
        allowNull:false
    })
    Price:number;
    @Column({
        type:DataType.BOOLEAN,
        allowNull:false
    })
    IncludeDP:Boolean;

    @Column({
        type:DataType.INTEGER,
        allowNull:false
    })
    Sector:number;
}
We'll create one more file, portfolio.provider.ts that will act as a repository
import { Portfolio } from "./entities/portfolio.entity";

export const portfolioProviders = [{
    provide: "PORTFOLIO_REPOSITORY",
    useValue: Portfolio,
}];
All set up is completed. Let's look at our dabase folder once.
Finally, we have the database configured, controller, service, and repository ready.
Let's create a new Record.
//servi
@Injectable()
export class PortfolioService {
  constructor(@Inject("PORTFOLIO_REPOSITORY") private readonly portfolioRepository: typeof Portfolio) { }
  async create(createPortfolioDto: CreatePortfolioDto) : Promise<Portfolio> {
    return await this.portfolioRepository.create<Portfolio>(createPortfolioDto)
  }
@Controller('portfolio')
export class PortfolioController {
  constructor(private readonly portfolioService: PortfolioService) {}
  @Post()
  create(@Body() createPortfolioDto: CreatePortfolioDto) {
    return this.portfolioService.create(createPortfolioDto);
  }
Now the only thing remaining is to verify that everything is working with postman
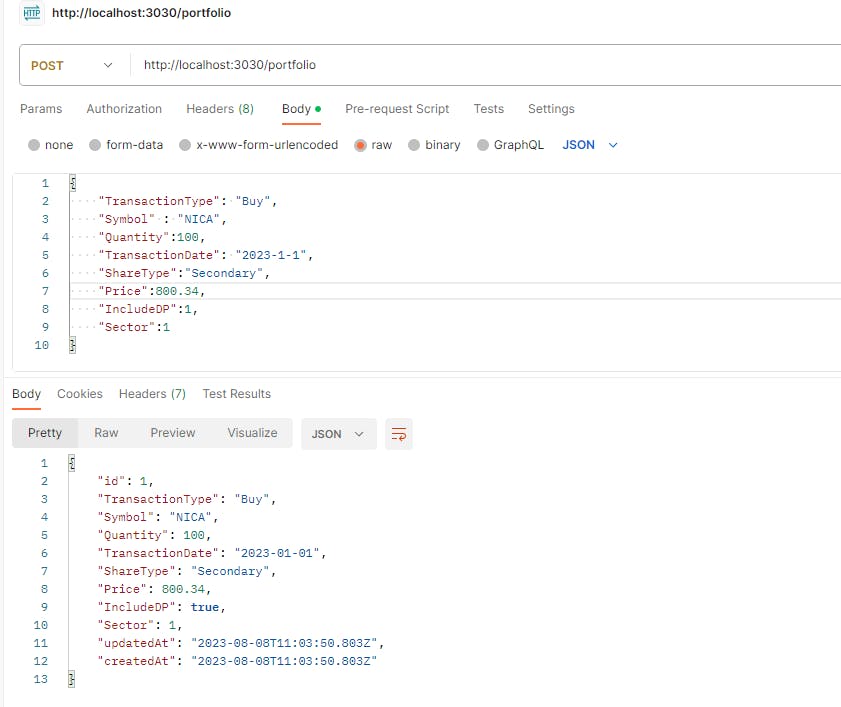
PERFECTO!
END OF PART ONE.